
Introduction
AWS is a well-known cloud provider whose primary goal is to allocate server resources for software engineers to deploy their applications. AWS offers many services, one of which is EC2, providing virtual machines for running software applications in the cloud.
However, for data-intensive applications, storing data inside EC2 instances is not always the optimal choice. While EC2 offers fast read and write speeds, it is not optimized for scalability. A better alternative is to use S3 storage instead.
Storing data in EC2 vs S3
Amazon S3 was specifically designed for storing massive amounts of unstructured data:
- It has a highly reliable resilience system, thanks to which the durability rate exceeds 99.99%.
- S3 automatically replicates data across multiple servers to prevent potential data loss.
- It seamlessly integrates with other AWS services for data analytics and machine learning.
- Storing data in S3 is significantly more cost-effective compared to EC2.
The main use case where EC2 might be preferred is when frequent data access is required. For example, during machine learning model training, where the dataset must be read repeatedly for each batch. In most other cases, S3 is the better choice.
About this article
The objective of this article is to demonstrate how to create a basic S3 Storage. By the end of the tutorial, we will have a functioning S3 storage that allows remote access to uploaded images.
To keep the focus on key aspects, we will cover only the storage creation process and not dive into best security practices.
Tutorial
# 01. Create S3 storage
To perform any operations related to S3 storage management, select the Storage option from the service menu. In the submenu that appears, choose S3.

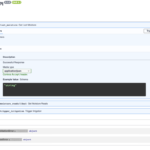
AWS organizes data into collections called buckets. To create a bucket, click Create bucket.

Each bucket requires a unique global name. Most other settings can be left as default.


Once all options are selected, click Create bucket. After a few seconds, AWS will redirect you to the bucket management panel.
# 02. Create folder (optional step)
Folders in S3 function similarly to standard computer folders, helping to organize hierarchical data. Additionally, any file stored in an S3 folder will have a URL prefix that includes the folder path.
To create a folder, click the Create folder button.

In the appearing window, choose a custom name for the folder.

After clicking the Create folder button, the folder will be created! You can now navigate to it. Since no images have been uploaded yet, the folder is empty for now, but we will add images in step 4.

# 03. Adjust data access
As a reminder, our goal is to create a publicly visible image storage that allows remote access. To achieve this, we need to adjust data access policies.
By clicking on the Permissions tab under the bucket name, you will see a list of options to modify access settings.

We need to unblock public access, so click on the respective Edit button in the interface and uncheck all the checkboxes related to access blocking.


After saving the changes, we should see an exclamation mark icon with the “Off” text. Then, navigate to the Bucket policy section and click Edit.
To allow read access, insert the following policy text:

# 04. Upload images
Now it is time to upload images. To do that, navigate to the created “images” folder and click on the Upload button.

Click on the Add files button, which will open a file explorer on your computer. Choose and import the images from there.

Depending on the number and size of the imported images, AWS might take some time to process them.

In this example, I have imported nine images.
# 05. Access data
After the images have been successfully imported, click on any of their filenames to get more information.

In the opened panel, you will see metadata related to the chosen image. As we can see in the “Object URL” field, AWS created a unique URL for our image!
Additionally, we can notice that the URL contains the images/ prefix, which corresponds exactly to the folder structure we defined above!
Finally, since we have authorized read access, we can now publicly access this URL.

If you click on the image URL and copy it into the browser’s address bar, the image will be displayed!

The amazing part about this is that you can now create a URL template in the form https://<bucket_url>/<folder_path>/<filename>.
By doing so, you can dynamically replace the <filename> field in a program to access images and perform data manipulation.
Conclusion
In this article, we have introduced the AWS S3 storage system, which is very useful for storing large amounts of unstructured data. With its advanced scalability and security mechanisms, S3 is perfect for organizing massive data volumes at a much lower cost compared to EC2 containers.
All images are by the author unless noted otherwise.
Connect with me


The post Beginner’s Guide to Creating a S3 Storage on AWS appeared first on Towards Data Science.
How to quickly create cloud storage and access it remotely
The post Beginner’s Guide to Creating a S3 Storage on AWS appeared first on Towards Data Science. Data Engineering, AWS, Cloud, Data Processing, S3, Storage Towards Data ScienceRead More

 Add to favorites

0 Comments